
 Lifecanbetoff
I never intended on buying a drinks cabinet let alone have any need for an upcycled drinks cabinet. Honest. But when I saw this one come up on Ebay locally, I knew immediately I wanted to buy it with the whole purpose of upcycling it.
I paid £15 for it in total, we crammed it in the back of Jon’s car, and when I say crammed, it was crammed, boot tied down and I was holding on to it just in case it decided to fall out the back and smash up on the Tetbury/Cirencester road haha!
Anyway, once it was home, I then had the fun task of decided where in the hell I was going to put it.
As mentioned before, I had no intention or need for an upcycled drinks cabinet and it was taller than my sloping walls allowed. So it temporarily got put in the bedroom until I decided what to do with it.

Original features
I had bought this cabinet with every intention of upcycling it, I had seen lots of upcycled drinks cabinet ideas on Pinterest in the short time between bidding on the item and winning it.
However, upon seeing what fabulous condition it was in, I was reluctant to paint it. It is and was a beautiful cabinet, in perfect condition. I had managed to date it back to around 1930’s and it still even had the makers plate on the inside door.
It sat in my bedroom, unpainted for several months.
My reluctance to paint it was eventually outweighed by my obscene amount of dark wood in my flat. I just needed the motivation to start the project.
Until one Saturday afternoon (having already purchased the paint from Vintage Rocks) and the wallpaper from Very, Jon gave me the push to get up and paint it!
Painting furniture with chalk paint
This was the first large scale project I had upcycled. I had done a side table previously in one of the other fantastic vibrant colours from the Vintage Rocks range and I’ve spoken previously about my love of the Upcycling Revolution.
But, this was my first, large scale project that involved wallpapering, removing handles and masking tape!
Chalk paint is incredibly easy to use and especially with the range from Vintage Rocks it requires no sanding or priming – even if the furniture is varnished. You can water the paint down for a more washed look or keep it thick for full coverage.
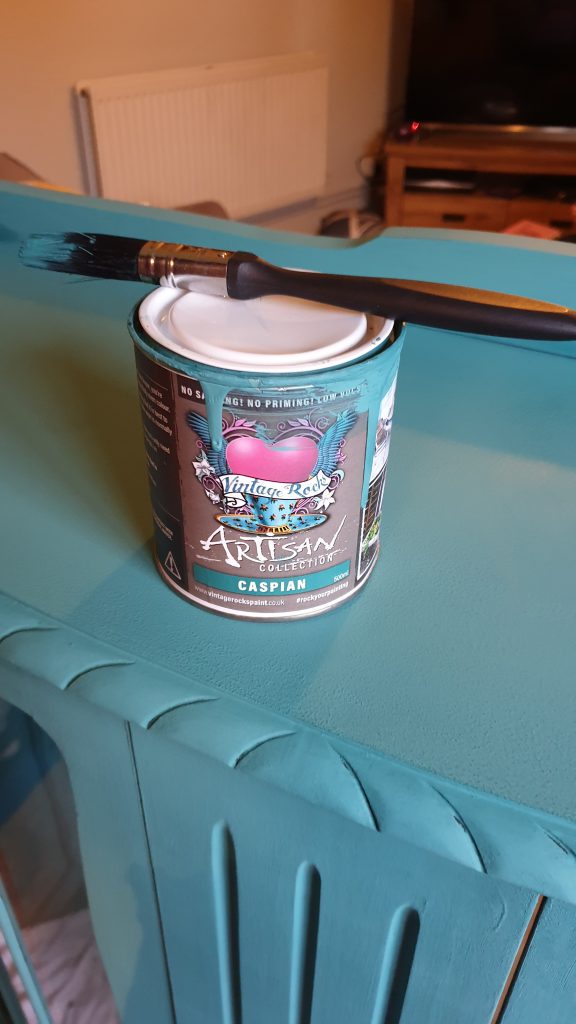
Sanding it down was not an option for me, so the paint was the perfect solution. I applied the paint (without diluting it) with a sponge roller on the larger surface areas and used a brush for the more detailed areas and cabinet doors.
I chose the colour Caspian, which upon initial application I wished I had gone for a darker colour as it had looked more like a dark teal online. The first coat went on with good coverage but it definitely needed another coat.

After allowing it to dry slightly, I applied the second coat and I could see it was coming together.
Finishing touches
After two coats of the paint I was happy with the coverage. The beauty of this paint is that if it feels dry, it is, and in the large part in a couple of hours it was dry but I left it overnight before I would apply the wax.

The next day, I waxed it off with a tin of clear wax from Annie Sloan (I already had it from before so had not bought the wax from Vintage Rocks).
I had ordered some gold finishing wax from Vintage Rocks but sadly it was out of stock with no idea when it would be back in – I had intended on using it on the doors and in the patterned edging to give it some definition.
But, I think it is just as lovely without it! I was glad that I had decided to keep the locks brass as they look really lovely against the vibrant blue.

As the wax went on, the colour darkened and I was really pleased with my choice of colour.
Wallpapering!
I have never wallpapered in my life.
The wallpaper I bought was like cardboard, really thick, high-quality paper which I wouldn’t personally choose for a wall, but it worked perfectly for the back wall inside the cabinet. I’d also considered creating my own design for the back wall, which could be done using *free svg designs. SVG Designs are used in crafting and creating customisable designs such as wallart, which would have been ideal for this particular project.
Thankfully, we were able to remove the back wall from the cabinet to allow the application of the wallpaper to be a whole lot easier! Of course, removing the back wall took almost as long as painting the cabinet itself.

1930’s drink cabinet screws are somewhat rusty…!
After we got the wall off, we laid it on the floor in the bathroom and set about putting on the wallpaper paste. Whilst the paste I got was suitable for wood and vinyl, it didn’t quite stick as well as I would have liked around the edges, another 24 hours later, I re-attached the back wall.
Once the wall was reattached to the cabinet, those issues were solved as that sealed the edges.
The finished piece!
I am so incredibly pleased with how this cabinet turned out. The vibrant colour, although not as dark as I had initially planned worked perfectly with the wallpaper and adds that real pop of colour to my bedroom.
Thankfully it was not a Pinterest fail!


DIY on a budget
This was a real budget project.
Cabinet: £15 (plus cost of fuel to collect from 5 miles away)
Paint: £9.95 for the 500ml tin
Wax: Previously purchased and used on other projects price unkown!
Wallpaper: £8 for the roll in the sale from very.co.uk I used maybe 3 metres from the roll in total which included pattern matching.
Time: Over 2 days it took maybe 4 hours excluding drying time. This was for painting, applying the wallpaper and cleaning.
Lesson’s learned
My lessons learned through this process was that I have little patience.
There was my rush to get it to dry to apply a second coat, a rush to wax it, for the wallpaper to dry so I could finish it off. Thankfully, the paint wipes off the glass and the metal fixings so where I had rushed and got messy, even with the masking tape, I was able to clean it up!
In order to make sure it was completed properly (and I still need to finish the legs off!) I had to be patient!
Applying the paint with a roller did mean that there was a slight textured feel to the paint once it was dry. This could be down to the roller or the consistency of the paint itself, either way, it does feel nice but perhaps could’ve been finished off smoother.
I didn’t lose my temper once either!
But, I also learned that it was an incredibly fun thing for us to do together, this little project that we saw from start to finish I think has given both Jon and I the DIY bug. Now I’ve got the drink’s cabinet I need to start my home bar!
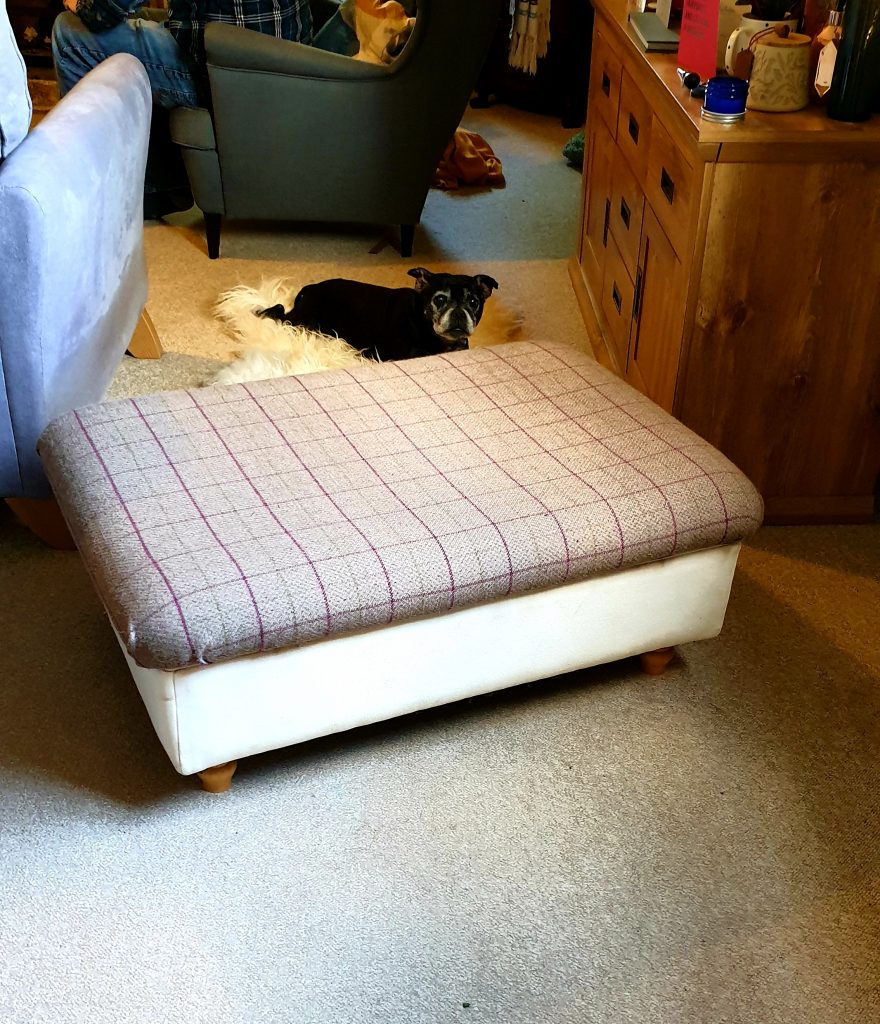
So much so, that for my birthday, Jon took me fabric shopping so I could finally make a start on reupholstering my ottoman – which is still unfinished due to me wanting a darker fabric for the bottom half, but I’m still really pleased with it!
I am really excited to find my next project – with either a chest of drawers or dining table and chairs next on my hit list!
Peace out!
Jangles x

*This page contains sponsored content.


This is lovely! The paint colour and wall paper work so well together, and I love how you’ve kept the original brass features. I’ve done a few upcycle projects; a wooden storage box, dining room chairs, a vintage blanket box / ottoman, and I’m working on my biggest project (a vintage bureau) at the moment. This has definitely given me the inspiration I need to finish it off.
I’d love to do a bureau but I have absolutely no need, or room, for one. Although, I could potentially use one as a dresser…Hmm thinking cap is on!