
 Lifecanbetoff
A DIY guide to your very own teacup succulent planters.
A couple of years ago I bought a set of really pretty teacups from a charity shop with every intention of filling them with scented wax and upcycling them as candles.
I never quite got round to it and quite frankly, made such a mess blowing out one candle a bit savagely, getting wax all over the place, that I decided molten wax probably wasn’t the way to go.
Which meant, my pretty teacups sat there, gathering nothing but dust.
Until a bit of Pinterest stalking gave me the idea to breathe new life into my pretty teacups.
It also meant I could feed my obsession with houseplants and succulents.
Yes – Teacup Succulent Planters!
This is also a great way to get on the upcycling revolution, something I wrote about recently.

How to make your own Teacup Succulent Planters
What you need – a pretty teacup (or five!), small succulents, potting soil and some small stones.
Or you could use succulent potting mix – soil combined with grit and sand to aid with drainage.

The perfect teacup!
First, get yourself on a teacup hunt!
I was really lucky to find a matching set of four teacups. But I think that odd ones with a bit of character would work perfectly too.
I’m not saying go and raid your Granny’s best china!
Charity shops, auctions and eBay are perfect candidates for pre-loved teacups.
Once you’ve got your perfect teacups, you need to get your succulents and potting mix.
Succulents
I bought my succulents in-store from B&Q at the bargain price of £2 each. There was a huge selection and they were all perfectly sized for my teacups.
They also came in little clay pots which you could reuse again afterwards.
Smashing the clay pots up would make great drainage in place of stones in the bottom of your teacup.
Potting mix and drainage
I was also able to buy the Westland Cactus and Succulent mix from B&Q. As mentioned above, this is pre-mixed with grit to aid drainage.
Don’t forget stones in your teacup if you are using normal potting soil.
Step by step:
- Source your teacup!
- Add your soil, not quite to the top (add stones first if using)
- Carefully plant your succulent in your teacup, they are quite delicate when removing from pots, so handle with care.
- Fill the teacup, pressing down around the succulent.
- Water and add more potting mix if necessary.
- Enjoy!
Vintage styling!
The beauty with succulents is they are fairly easy to keep, even if you are a plant killer.
I have found mine can handle not being watered every week (I forget a lot). They are also fairing really well in my dark flat.
In hindsight, I wish I had planted more than one succulent in each of my cups.
But, this just means I can buy more teacups and even more succulents!
How many times can a girl say succulent in one blog post?!
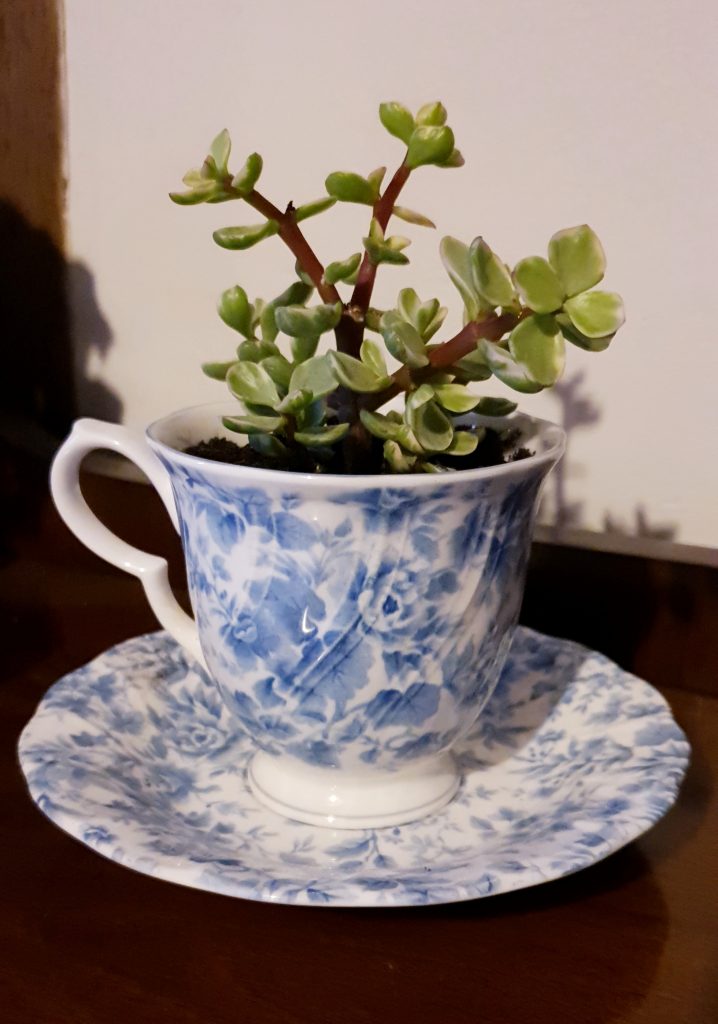
Go on, give it a go!
You can upcycle any container not just teacups, succulents are all the rage at the moment – use your imagination!
It’s really simple to do.
Peace out!
Jangles x
Disclaimer: This post is in no way endorsed, sponsored or in collaboration with B&Q or any other brand. I bought all my supplies during a lunchtime jaunt to my local store and felt it worth sharing the bargains I found!


Oh these look lovely, I do like the sound of making teacup candles too though! I feel like I need a charity shop visit for some inspiration for some projects 🙂
Stevie x
Charity shops have some great vintage crockery for these types of projects. I’ve often wanted to make little cupcake towers with mismatched china plates but wouldn’t trust myself with a drill and crockery! Good luck on your search! x